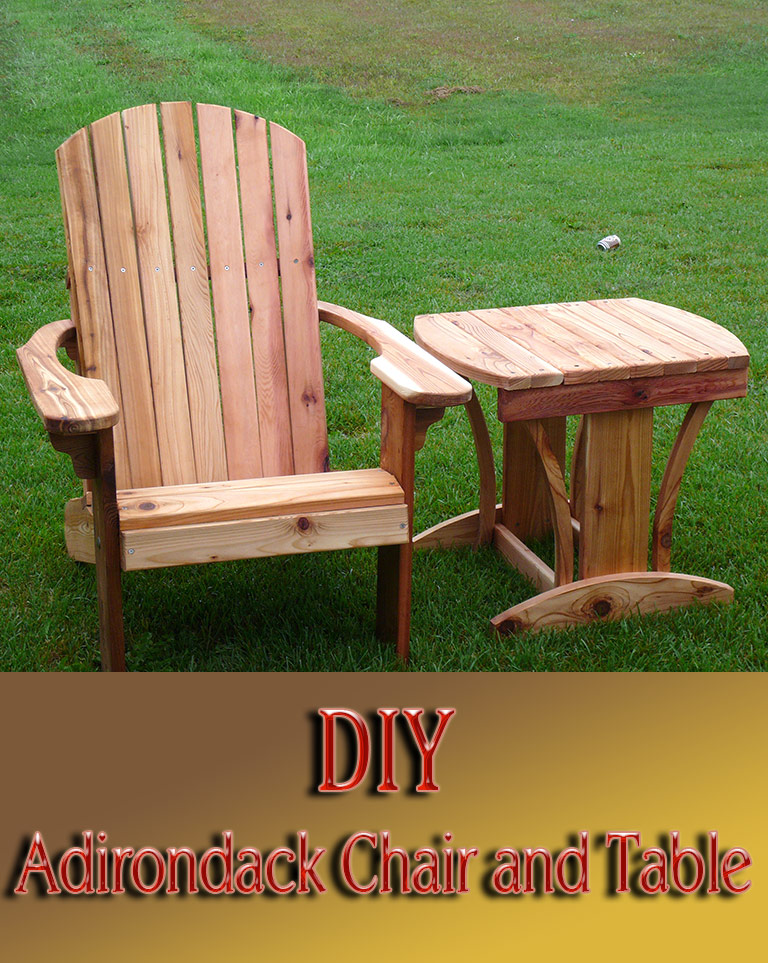
It’s a good thing that so many plastic patio chairs are designed to stack, and the aluminum ones fold up flat. That means we can get them put away and stored out of sight as quickly as possible. But, if you think outdoor furniture should enhance your yard and garden, consider a chair that evolved on the porches of summer homes and resorts of upstate New York. It’s an object that no one will want to hide, because it simply looks so good: the Adirondack chair.
Our version has come a long way from the early types that had flat backs and seats — and, we’ve added a matching table so you’ll have a stylish surface for cool drinks and a good book. Although there are a few angles and curves to cut, there’s no fancy joinery — everything’s held together with corrosion-resistant deck screws. We used cedar for these pieces because it stands up well to the elements, and it’s available in the required 3/4- and 1-in. thicknesses. You could substitute pine if you plan to keep the pieces out of the weather.
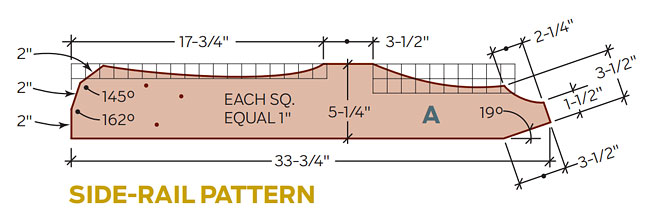
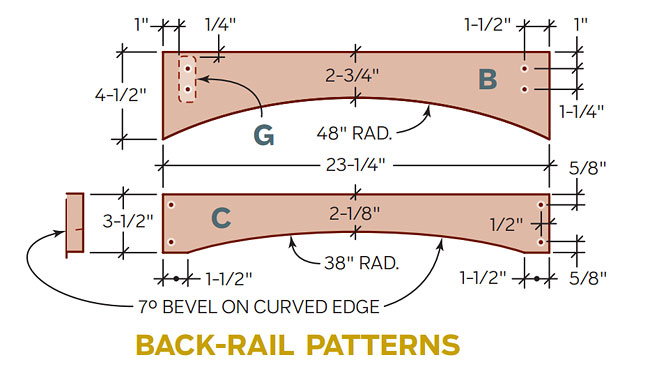
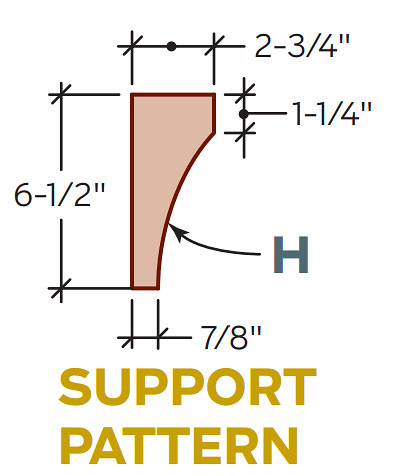
If you’re building more than one chair, it pays to make templates for parts like the side rails, arms and back rails. The patterns also will come in handy when your friends see your work and ask you to make chairs for them.
Adirondack Chair and Table Plans


Making the Chair Seat
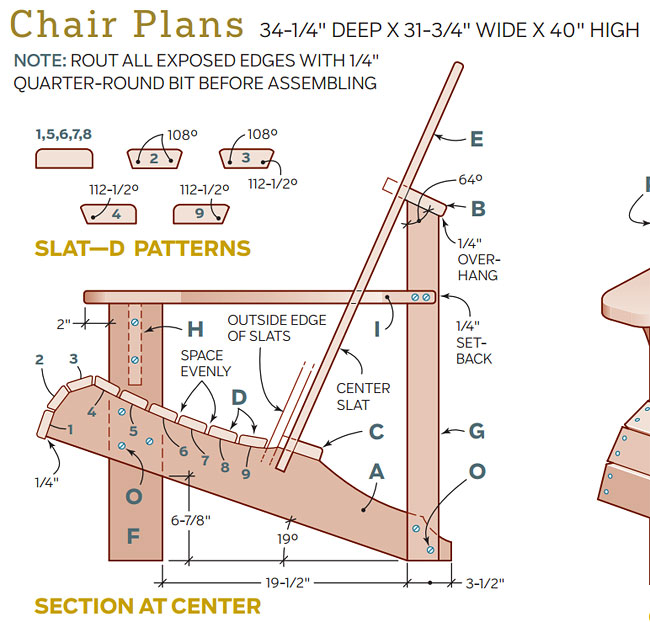
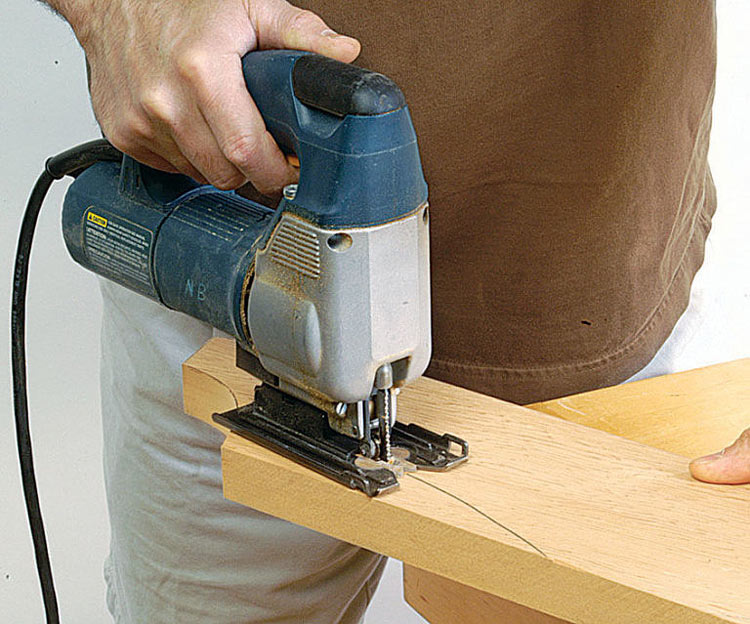
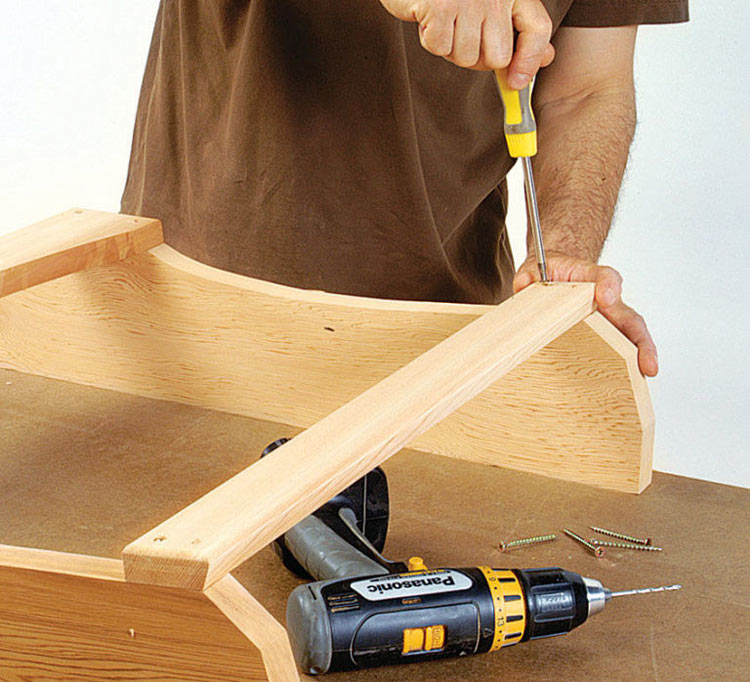
Lay out the side-rail shape on your stock, cut to the lines with a jigsaw [1] and sand the edges smooth. Then, cut the back rails to size, and saw the curves that give the chair back its concave shape. Note that the cut on the top rail is square, while the bottom rail has a 7-degree bevel.
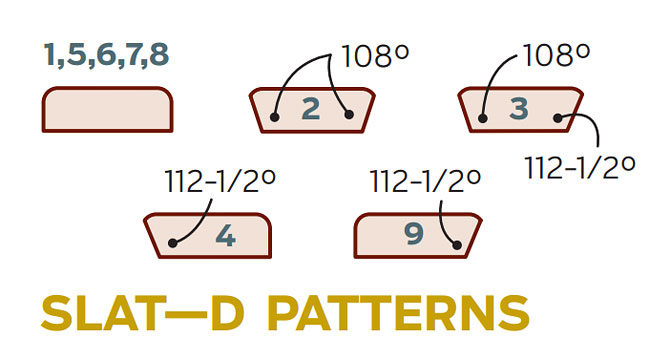
Cut the seat slats to size and round the upper edges of each with a 1/4-in. quarter-round bit in a router table. Then, round the exposed edges — those that won’t abut other parts — of the side and back rails. Keep the router table set up for this job so you can round the edges of the other parts as they’re made.
Because of the shape of the seat, most of the slats require bevels on one or both edges. Use a table saw or hand plane to cut the bevels.
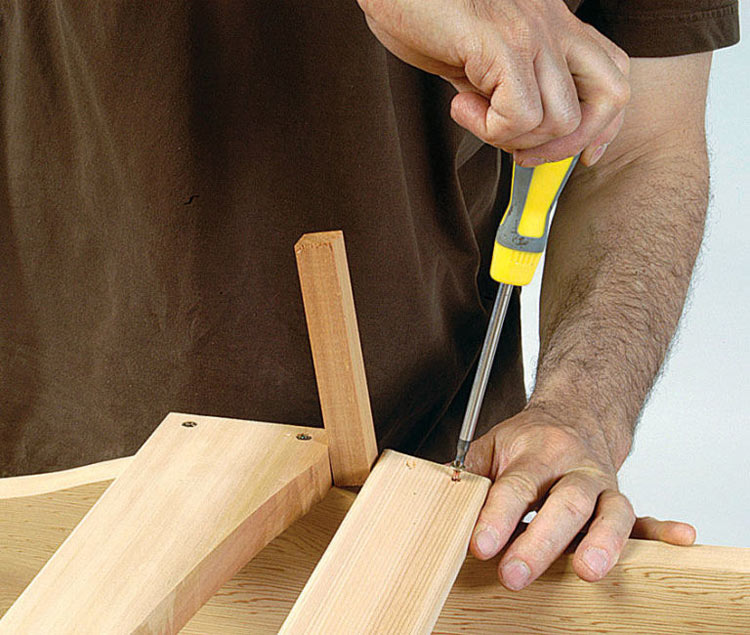
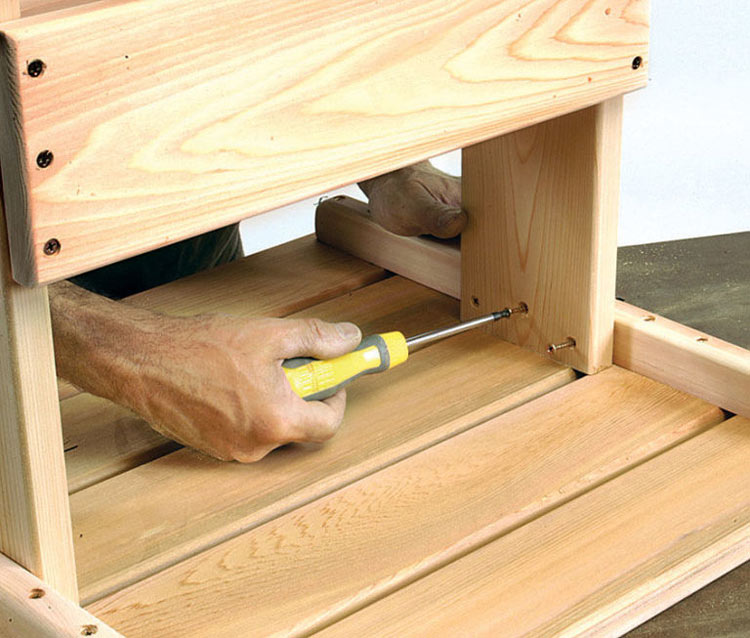
Start seat assembly by screwing the lower back rail to the seat sides with one screw at each end of the rail. Then, add slat No. 4 as indicated in the drawing, again using only one screw at each end [2]. Measure opposite diagonals of the subassembly and adjust it until it’s square. When you’re satisfied, add a second screw to each end of the two slats to lock the pieces in position.
Use a 1-in.-thick block as a spacer to position the rear seat slat [3]. Then install the remaining slats. Because the seat is curved and many of the slat edges are angled, don’t try to measure these spaces. Instead, simply arrange the slats by eye so that they appear uniform.
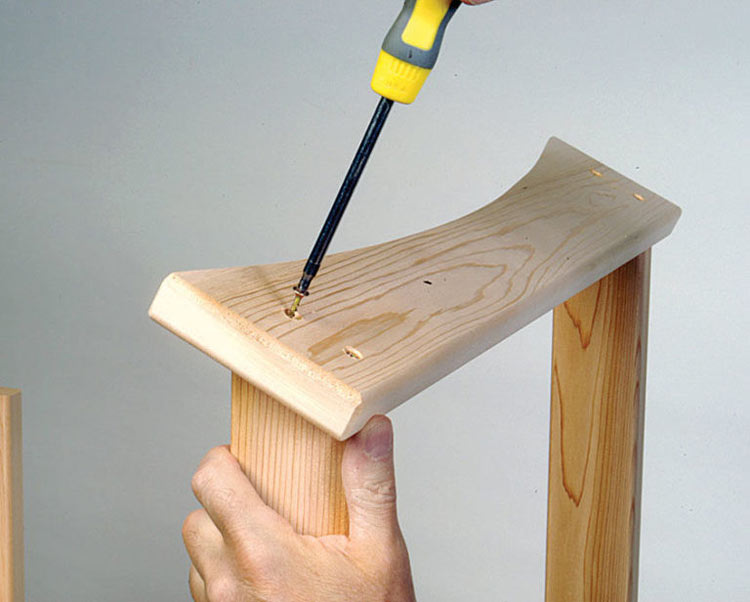
Cut the front legs to size and round the long edges on the router table. Mark a line on the inside face of each leg that indicates the bottom edge of the side rail. Then, attach the legs to the seat assembly with screws driven from the inside of the side rails [4].
Adding the Back
The back slats are tapered to create a fan shape when installed. Cut each 35-1/2-in.-long slat blank so one end is 3-1/4 in. wide and the other is 2-1/4 in. wide. We did this on a band saw, but a jigsaw will work, too. Smooth the sawn surfaces, cut the curved top ends and round the edges.
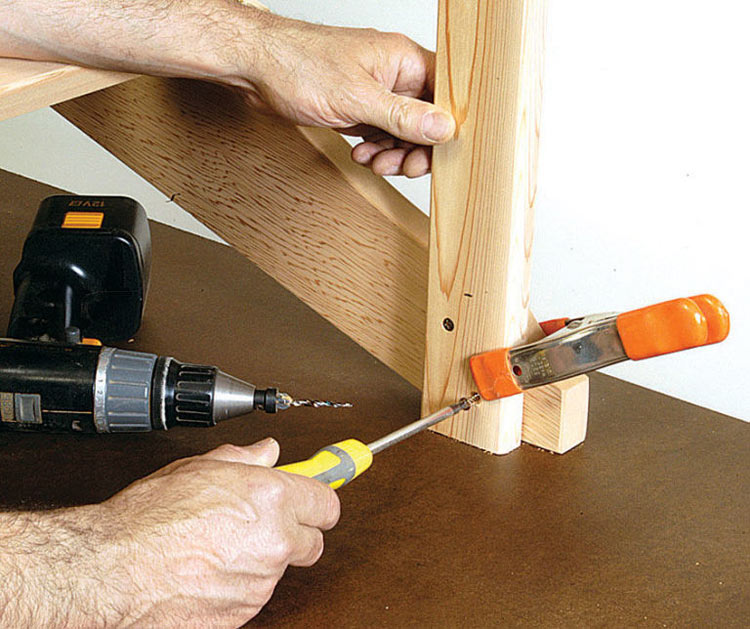
Cut the rear legs to size, angling the top ends at 64 degrees. Clamp each rear leg to a side rail, bore and countersink screw pilot holes, and secure the legs with screws [5].
Next, screw the top back rail to the top ends of the back legs [6], and lay the chair on its back to install the back slats.
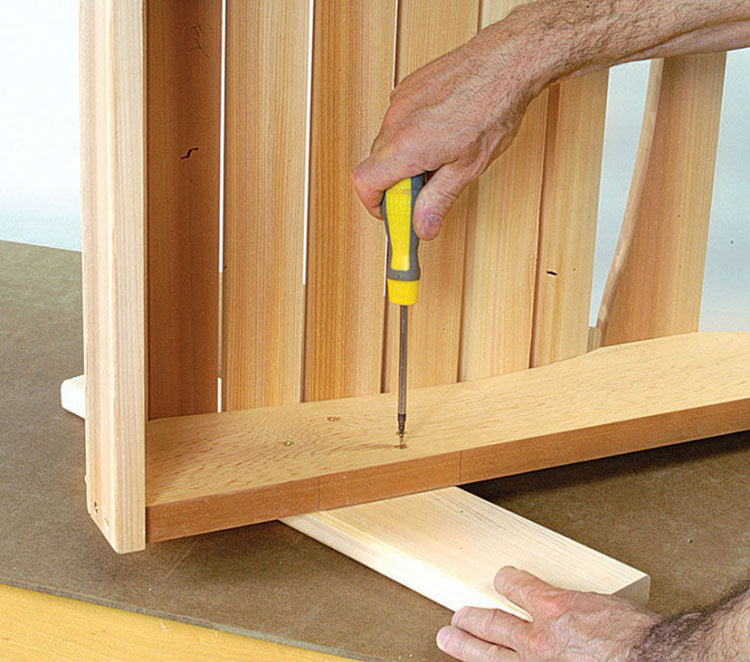
Place a 4-in. block under the upper back rail to provide clearance for the long back slats. Mark the centers of the top and bottom back rails, align the center back slat with these marks and screw it in place [7].
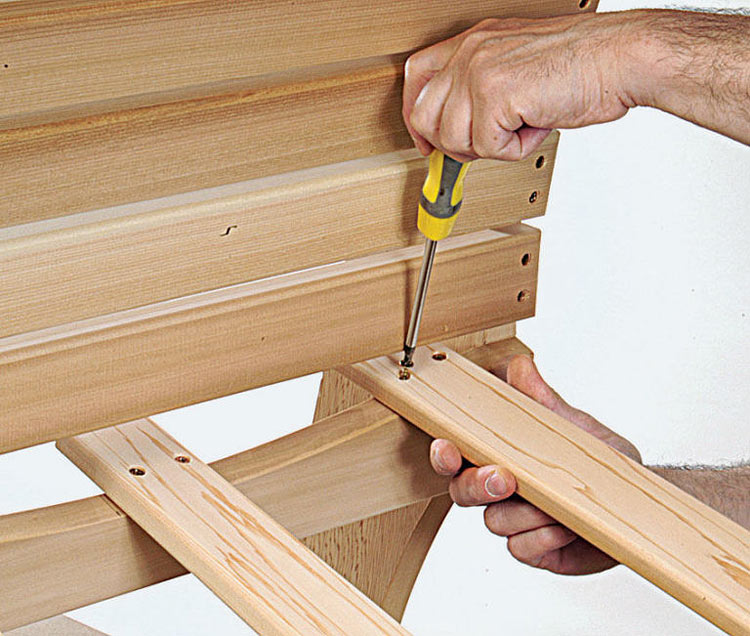
Then install the outer two slats [8]. Secure the remaining slats so the top curved ends are aligned and the spaces are uniform.
Installing the Arms
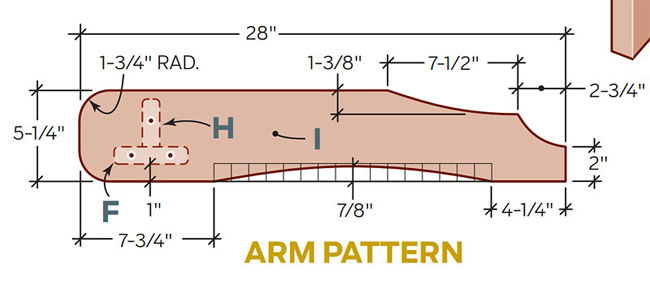
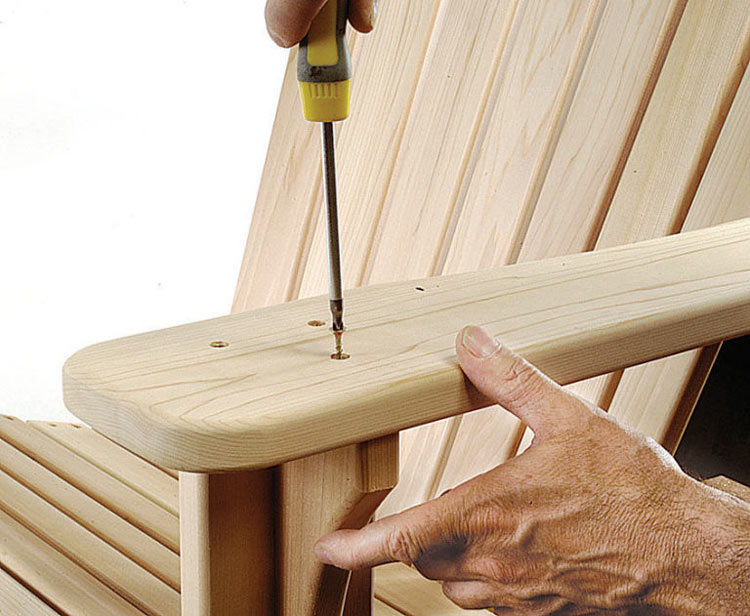
Cut out the arms and arm supports, and round the edges. Temporarily clamp the supports in place and secure them with screws [9].

Then, attach the arms to the front and rear legs with screws [10].
Making the Table
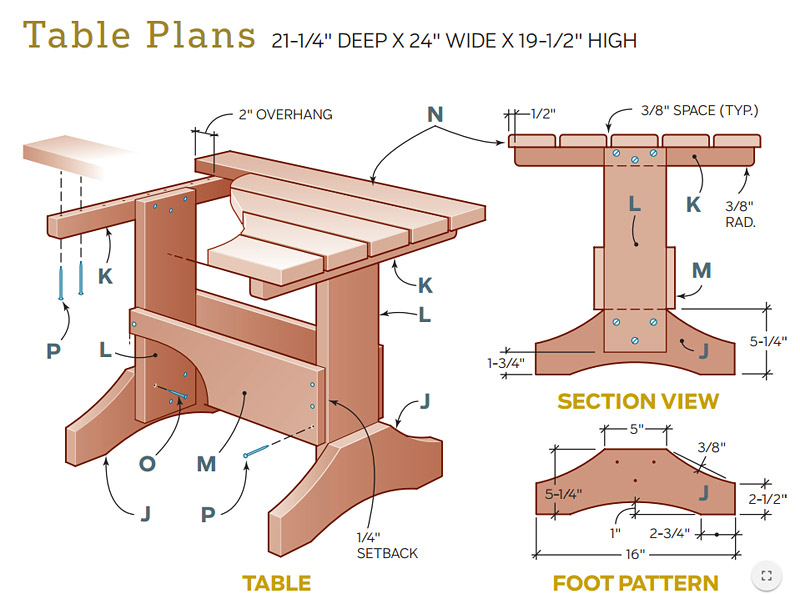
The table is built the same way as the chair — all exposed edges are rounded on the router table and the parts are simply screwed together.
Lay out the feet on 1-in. stock and cut to the lines with a jigsaw, then cut the remaining rectangular pieces to size.
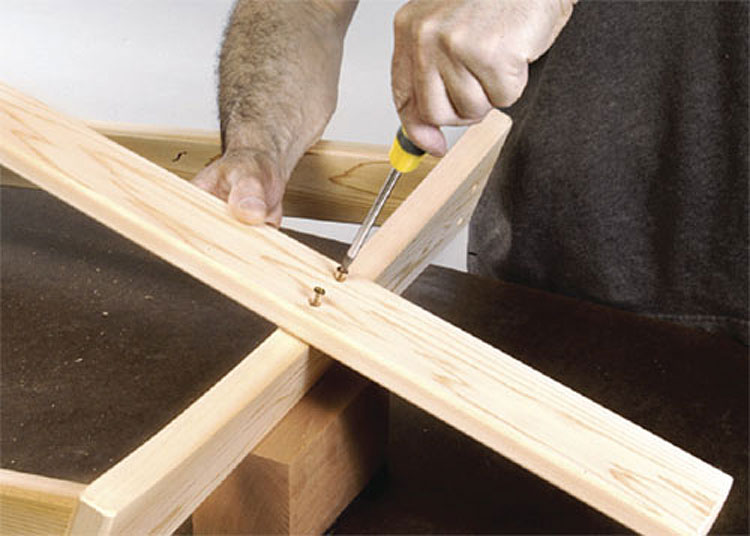
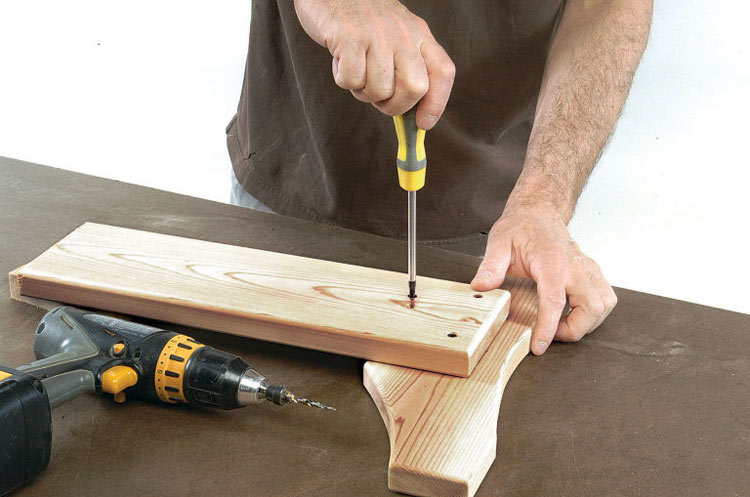
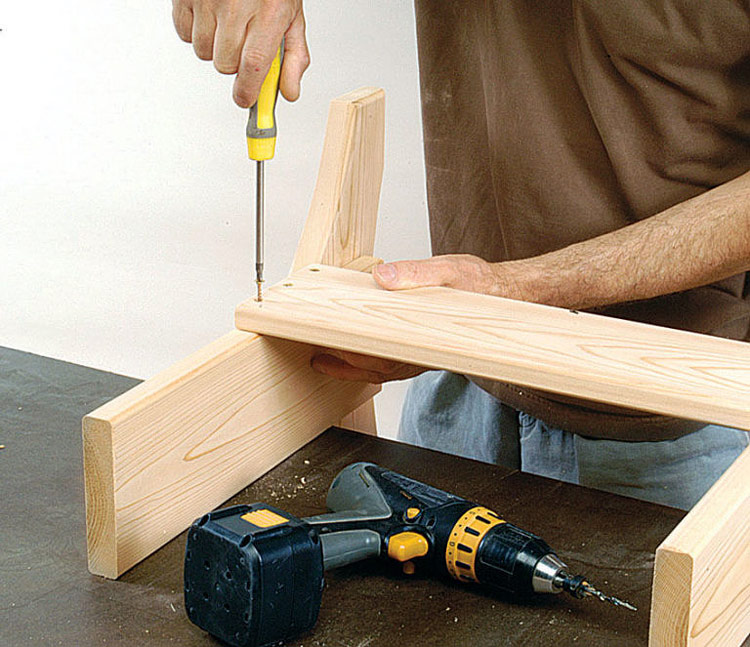
Attach each foot with three screws [11], then bore pilot holes and screw the two stretchers to the legs [12].
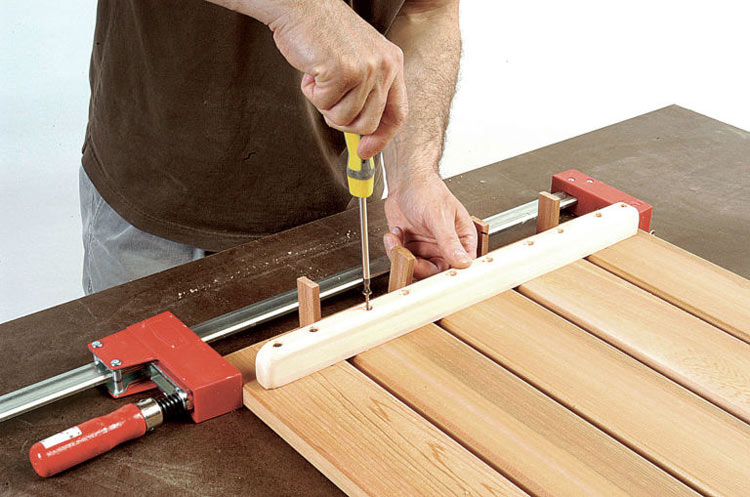
To assemble the top, it’s easiest to first clamp the pieces together with 3/8-in.-thick spacers placed between the top slats. Then, attach the cleats [13] — use the base subassembly to make sure they’re spaced properly.
Finally, screw the base to the top cleats [14].
Finishing
Lightly sand the chair and table with 120-grit paper. Keep in mind, though, that cedar is a soft, oily wood that doesn’t sand as well as pine or hardwood. You won’t achieve the silky smooth surface that you’d expect on indoor furniture.
We finished our pieces with Sikkens Cetol 1, 077 Cedar (www.nam.sikkens.com). First, wipe all the sanding dust from the wood, then apply a coat of finish with a natural-bristle brush. Allow each coat to dry for 24 hours before applying the next. Three coats should provide adequate protection from the elements, but it’s a good idea to cover the pieces in the off-season if they’re left outdoors.
Related: DIY – Summer Outdoor Sofa

Source: popularmechanics.com
Projest, Tutorial and Images: Neal Barrett

Two Food-Safe Wood Finishes Everyone Should Know
9 years ago

Clean Your Microwave Naturally
9 years ago
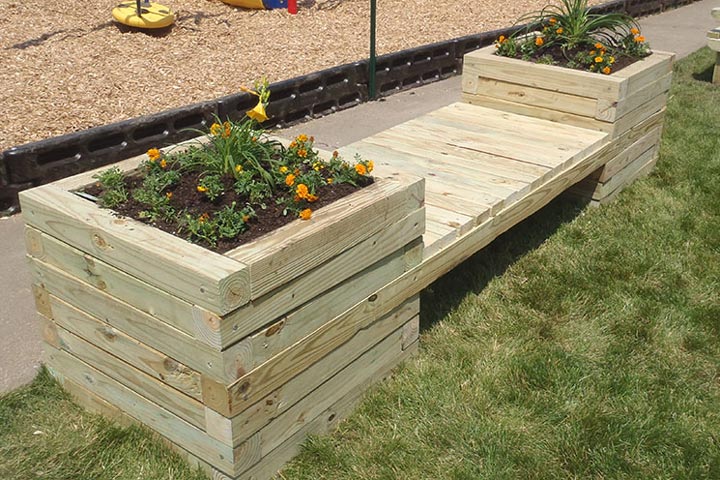
How To Build a Planter Bench
10 years ago
Leave a Reply